Infinity Battlescape Quick Start & Game Guide
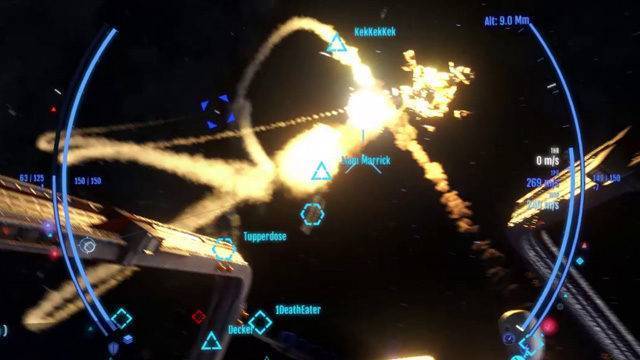
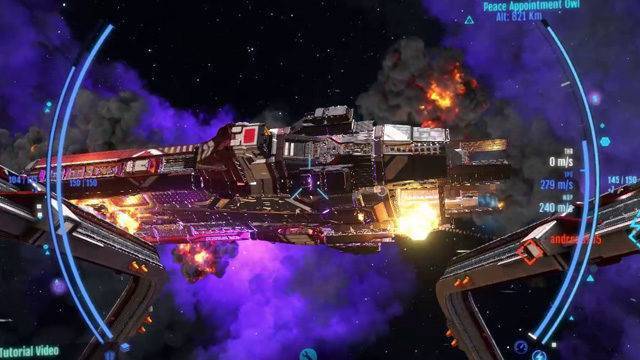
Infinity Battlescape is an epic space war waged in massive ship vs ship battles around Rethe Prime, its moons and their surface environments. You can get into spectacular battles within minutes.
Page Contents
Overview
Infinity Battlescape is an early access space war game available on Steam. There are two factions fighting for control of the space stations, factories and bases scattered across the moons of Rethe Prime. Each war is composed of a series of strategic ship vs ship battles. No grind is required to take part in the battles, and credits you earn will enable you to launch chunkier ships to hand out some outrageous damage.
Battlescape Quick Start
These are the sequence of screens you will go through from loading the game to entering a battle.
Launch & Choose Multiplayer
Launch the game and you won’t get a lot of feedback so keep your eye on the rotating idle icon in the top left. Other than that, not a lot happens.
Once the game has loaded you can go for the Multiplayer option. Since this is an early access title some of the options on the main menu are not available yet.
Choose a Server & Team
When you enter the multiplayer option you will be presented with a list of game servers to choose from. They helpfully show you the ping time and the number of players on each server so you can choose between responsiveness and numbers of players.
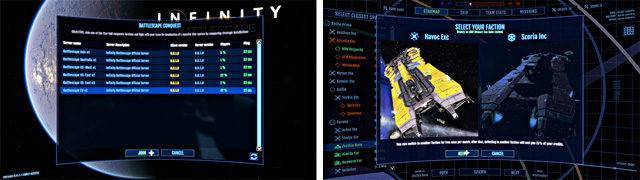
Once you are on a server you will have to choose which side you will fight for. Assuming the game will try to auto-balance the numbers, pressing the KEEP button would help maintain a balance. After you choose your side, the Star Map will mark your team green and the enemy team as red.
Select a Mission
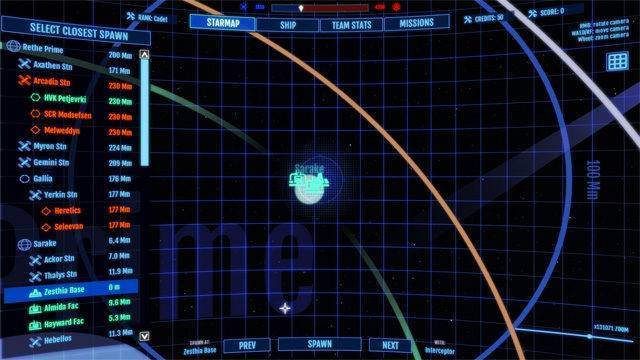
The best way to get into the game is by using the MISSIONS tab at the top of the screen. A mission identifies a location that should be attacked or defended.
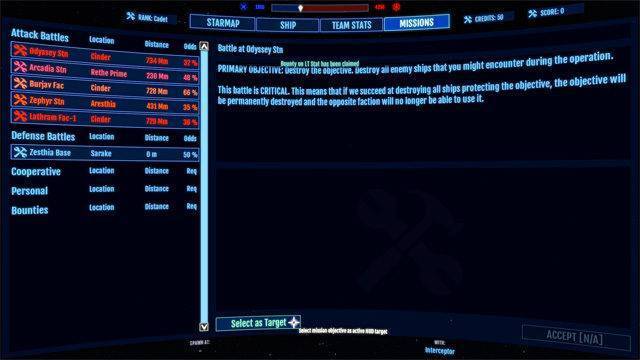
Choose a mission by clicking on it then set ‘Select as Target’ a the foot of the screen. If the mission is ready to go a ‘Spawn’ button will appear at the centre bottom of the page to get you into the action.
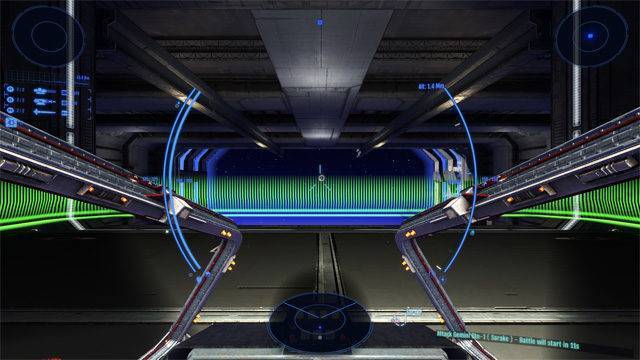
Spawn at a Location
When you spawn at a mission location, the Keyboard Help will be displayed as a reminder and you can remove this by pressing F9 or ESC. Press W to go forward and you are on your way. Shoot anything marked by a red icon.
Unable to Launch a Mission?
If you are unable to select a mission and spawn to that location it’s most likely due to the game state. I would anticipate better feedback appearing on these interfaces as development progresses.
To enter the game manually, switch to the Star Map page then select a green location to join your teammates or a red location to attack your enemies. Use the right-click menu on your selection to create a HUD radar target to match the location.
Note: At the time of writing there seems to be a colour identity issue between the ship HUD markers that use blue for allies and the Star Map list that uses green for allies.
When you spawn into the game you may need to fly towards your radar target. Accelerate to maximum speed, apply boost and after a few seconds activate the warp drive.
It can get ridiculously fast and you can’t cut through the atmosphere at that speed. Fortunately, you can slow down and stay in warp until you get close to your destination. The target symbols will overlay planets and stations that may be in front of them so you will have to read the Target Distance value to determine which is closer.
Battlescape Quick Controls
You are Good To Go with a mouse and keyboard straight away. I was unable to use my T-Flight Hotas X since it misread an axis. Device configuration is a work in progress but if you want to put the time in, you can follow the links provided below for help.
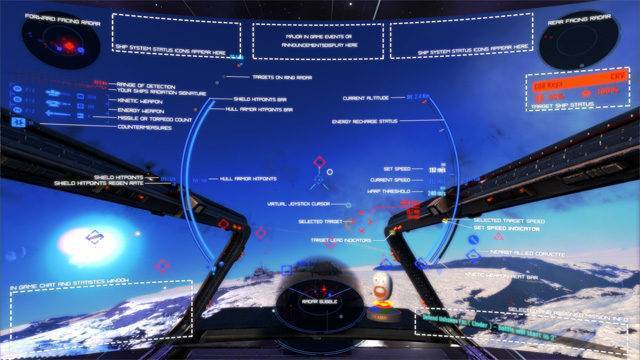
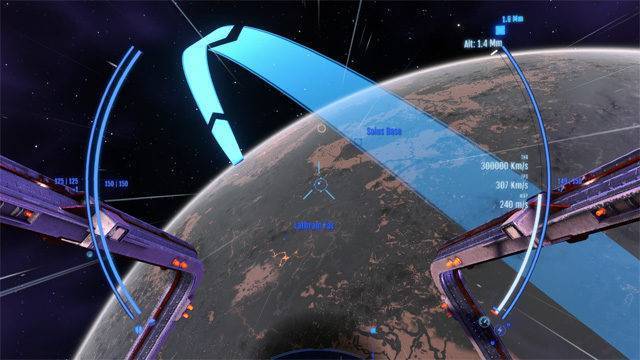
The HUD Help Page
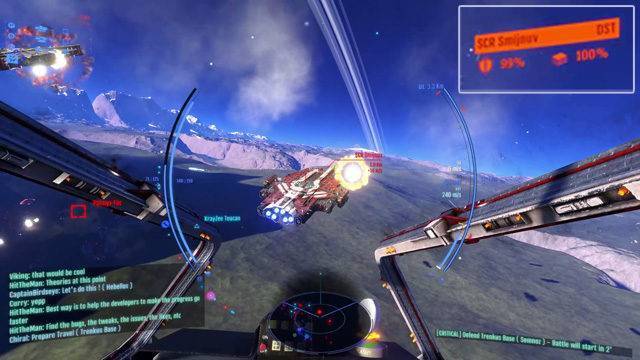
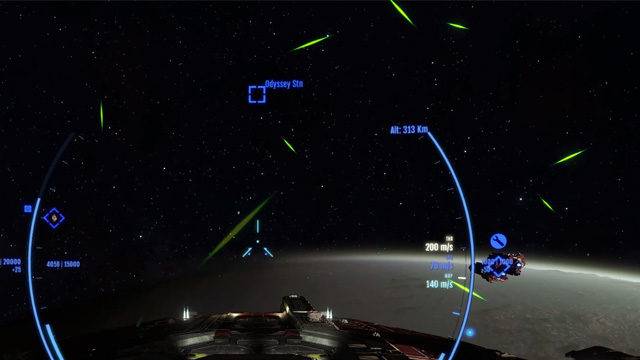
The HUD help page is available on the ESC main menu key to let you know what all the icons on the screen mean. The most important information is the energy, speed and altitude presented on the right-hand arc. The left-hand arc shows armour and shield strengths.
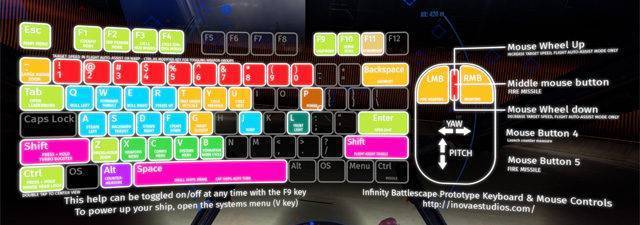
The Keyboard Help Page
Hit F9 to bring up the keyboard help page if you are curious. Otherwise, you can use the W, A, S, D movement keys and fire your weapons for some frantic fun.
Priority Mouse Controls
These controls are pretty much what you might expect, but its good to confirm that before you get going:
- Mouse movement changes ship direction
- Left button – fire weapon 1
- Right button – fire weapon 2
- Middle button – Hold for missile lock, quick press to fire
- Wheel up – increase maximum velocity
- Wheel down – decrease maximum velocity
Priority Keyboard Controls
You can have an hour or two of instant fun by getting acquainted with these few controls:
- W, A, S, D – forward, left, back, right
- R, F – Up, down
- Q, E – Roll left, roll right
- SHIFT – boost speed
- J – Enter warp speed (must be travelling fast already)
- G – Find the closest target
- T – Lock onto target under gun-sight
- TAB – Opens the star map and missions tabbed pages
- ESC – Main menu including the keyboard and HUD help pages
- F9 – Open the keyboard layout help page
Printable Keyboard Controls
Here is a scalable PDF file containing a printable version of the controls. It’s in shades of grey and the quick-start keys you need to get going are more noticeable than the others. You might find a paper version more convenient than popping open the on-screen display all the time… or you may not.

Battlescape Game Guide
This section describes the game in more detail.
How to Win
Each Battlescape match is a resource domination war composed of individual battles. You will be fighting to control the factories, bases and space stations of the moons of Rethe Prime. Your team wins the war when all your enemies bases have been destroyed.
You need credits to buy more powerful ships and obliterate the enemy. Credits are when targets are destroyed and haulers deliver resources.
The TAB key will display your command and control screen containing individual tab pages for the Star Map, Ships, Team Stats and Missions. You will choose a ship according to your current budget and a location via the Star Map or Missions tab page.
Mapping Enemy Bases
At the start of a new war, players should take out Interceptors to scan for enemy factories and stations. Once a location has been scanned it will be listed on the Star Map so that your team can see it.
Ongoing Battles
Critical attack and defence situations are listed in the Missions page with an indication of their importance and progress. If there are no critical battles in progress you can find battles in progress on the left-hand list in the Star Map. Alternatively, you might opt to destroy enemy Haulers to prevent credit generation.
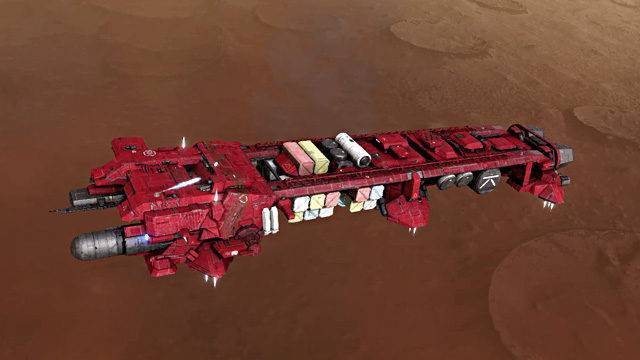
Hauler Supplies
As the war progresses Haulers will attempt to take resources from ground factories to space stations. A successfully delivered shipment generates credits that are shared across the team. The more credits you have the larger the ships you can use to drive the war effort.
Priority Goals
There is a lot for a new player to learn. Here are a few of the things that will make your contribution to the war effort count.
- Scan for enemy bases at the start of a war so they can be targeted.
- Keep your eye on the critical missions page so you can engage in the most decisive battles.
- Use credits to mobilise larger ships that will make a bigger impact to the battle you are entering.
- Destroy enemy Haulers and the pads they use to stem the flow of credits to your enemies.
- Provide assistance to remote battles by flying a carrier for your team to use as a spawn point.
- Provide backup to your team with a Corvette to repair and rearm ships in battle.
The Missions Page
New and ongoing battles are shown in the Missions tab. The win/loss proportion is displayed for each battle. Locations with countdown timers in seconds have not yet started, so you have time to disengage from your current location and prepare for the new event.
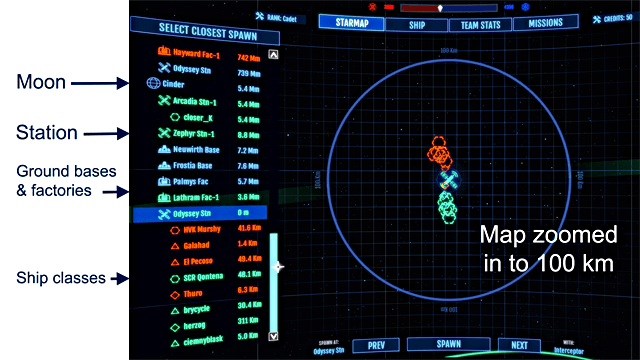
The Star Map Page
The Star map provides a hierarchical list view of the moons, stations and players that are in the game. Ship types are represented by triangle, diamond and hexagon icons, bases and factories are represented by a rectangle when shown on a player’s HUD.
You may be able to use Carriers (denoted by hexagons) to spawn directly into battle locations, otherwise, you might need to use a station and travel to the destination. By right-clicking an item and choosing ‘Select as Target’ your ships HUD will be given the target and this will be confirmed at the top right of the screen in the target status panel normally used in battle.
Once you have selected an item on the star map list you can zoom the map all the way in to view the ship movements at that location as if you were already there.
Human or AI?
On the Star Map and in your battles, the AI-controlled craft will have icons marked with a slightly darker colour and the humans have a slightly lighter colour.
Spawn Issues
You can use the Missions or the Star Map tab to select a spawn point to enter the battle. If you have selected a ship that you can no longer afford then you will be unable to spawn a ship into a location… choose a lower-priced ship.
Bear in mind that you can select carriers as spawn destinations from the Star Map.
If you spawn onto a pad showing red barrier lines it means that the correct landing pads you should have arrived at are out of action. That means you will only be able to rearm and repair by approaching a Corvette now.
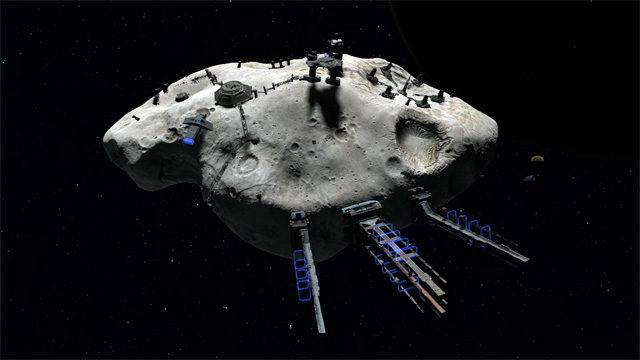
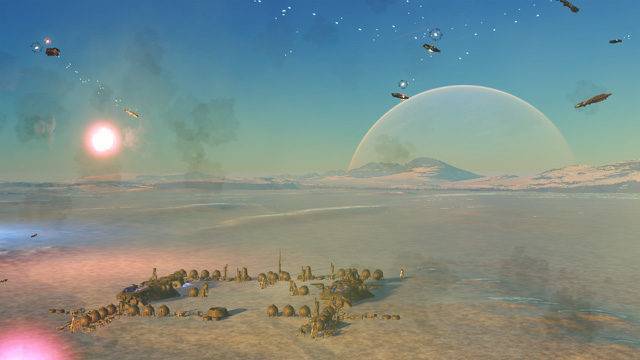
Rethe Prime and its Moons
These are the locations that contain the factories, bases and space stations where battles take place.


Warp Speed
Warp speed can be achieved by accelerating your ship and pressing J. The ship will automatically adjust its velocity to suit local conditions such as approaching a space station. Managing an atmospheric entry has to be tackled by manually adjusting your maximum speed.
You can increase and exceed safe warp speeds by pressing your FORWARD key as well as move left, right up and down while steering.
Warp speed is useful to quickly scope out a battle scene by flying around the group and it also helps in moving across a battlefield quickly although weapons will be disabled during this time.
Scanning
The Interceptor is the only ship equipped with a scouting scanner and this should be deployed at the start of a match in order to locate enemy bases and stations.
You can initiate the scanner from the V radial menu. The scanner has a scale marked in logarithmic kilometre increments from 10^0 to 10^6. Energy sources such as moons will show up as spikes at the right-hand end of the in the distance scale.
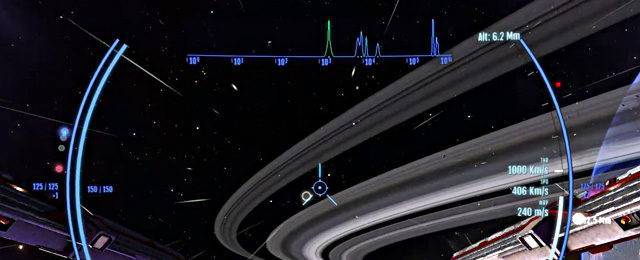
When flying at warp speed towards an energy source, its energy spike will be marked in green as it moves down the distance scale from right to left. You won’t be given directional information, but if you pass the target the energy signature turns red and moves back up the scale.
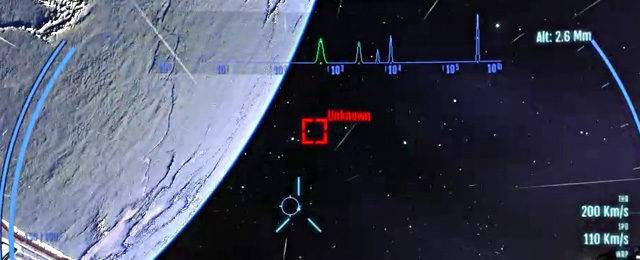
Once you are within range of the energy source your HUD will display and ‘Unknown’ marker showing its location. Once you are within 10^3 of the location consider slowing down and looking for the marker. Fly towards it and lock on using your targeting computer.
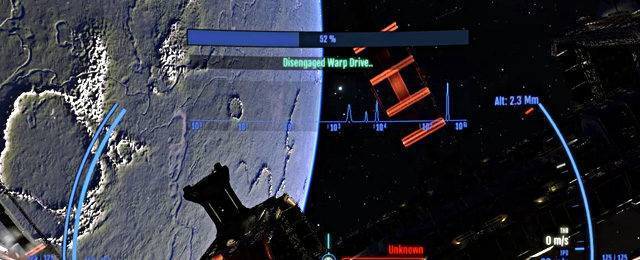
The scanning process is finalised when you are locked onto the target at close range. A scanning bar appears at the top of the screen and when completed will add the station to your team’s Star Map for the rest of the war.
Flight Assist
Flight assist will maintain speed in your cursor direction while reducing residual speed in other directions. This makes the craft easier to control but also makes it a slower target.
With flight assist off, you will continue in the same direction until thrust has been applied. If you are trying to make a getaway, turn off flight assist and keep your accelerator on.
Flight Control Schemes
Interceptors, Bombers and Corvettes
The aiming sight is fixed and the ship turns to follow the mouse cursor. The further away the mouse cursor gets from the centre of the screen the faster the ship turns. The W, A, S, D, R and F keys are used to move in x, y, z-axis directions.
Destroyers, Cruisers and Carriers
There are different modes of operation that can be accessed using three groups of keys: (F1 to F4), (W, A, S, D) and the throttle target keys (0 … 5). Note: higher throttle values are available in warp travel.
The mixture of keys is a little bit unwieldy, here’s a shot at explaining them:
- F1 – Select a view from the ship. If what you are seeing doesn’t make sense, you can adjust it by holding down CTRL and moving the mouse. It’s usually best to centre it to the forward view.
- F2 – Third person view
- F3 – Selects Exploration or Combat HUD displays.
- F4 – Select the control mode:
- Auto – Select mode automatically.
- Target – The ship follows the mouse cursor as if you were in an interceptor (when the view is looking straight ahead). To adjust the view hold down CTRL and move the mouse.
- Direct – Drive thrusters without scaling.
- Cap Ship – The mouse is used for aiming at targets, the keyboard is used to turn the ship.
- W – Raise the nose
- A – Rotate left
- S – Lower the nose
- D – Rotate right
- Q – Roll left
- R – Roll right
- 0 – Stop
- 1…5 – Forward motion
The easiest way to get acquainted with flying Cap Ships in this mode is to set the view to mimic an interceptor (F4: Target mode), add gentle velocity (eg: 3) and get used to manoeuvring the ship using only the keyboard. If things go wrong you can then rescue the situation using the mouse cursor.
When you have that nailed you can switch to Cap Ship mode and add free form targeting to the mix. To do that you should:
- Set a key-bind to toggle CapshipAutoTurn (eg: F5 or SPACE) and when in-game enable that feature.
- Set a key bind for CapshipTurn (eg: Left SHIFT)
- Set the control mode to Target Mode.
- Press a numeric key to go forward.
- As you pick off targets using your aiming cursor, press CapshipTurn to rotate into the same direction.
Refer to the I-Novae video tutorial at the end of this article.
Targeting
This section covers the type of targeting you will do in an Interceptor for example, where you pick a target and follow it.
The G key will lock your targeting computer onto the nearest enemy ship anywhere around you. That’s not always the best thing to do and as you will naturally migrate to using the T key to manually select specific targets that match your ship’s capabilities.
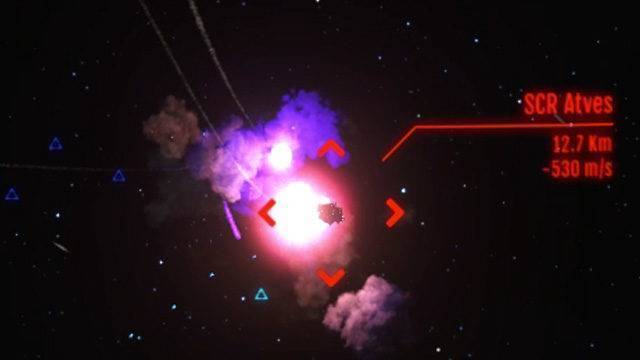
Once you have a target lock on an enemy ship your HUD will display the pilot’s name and the distance between you. Be aware that the shield and armour strength of the target is also displayed at the top-right of the display.
Incidentally, the colour of the name-tag is lighter for humans and darker for bots, and this might affect your tactical response.
The targeting computer adds a velocity direction indicator to your target with a different aiming point for each gun.
If the ship has its shields up, projectile weapons such as auto guns will not be able to inflict as much damage proportional to the shield strength. So if it’s low its worth having a go. An energy weapon (blaster) is needed to neutralise the shielding and once the shield is down, guns will tear into the hull faster than a blaster.
To maximise the damage shots make, try to get a perpendicular impact to the surface. Glancing blows don’t so as well.
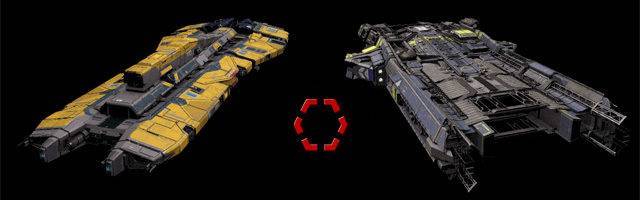
Ships
There are six ships paired into three sizes with an icon indicator. Three of those ships (the Destroyer, Cruiser and Carrier) are Capital Ships, which splits the same group into two parts.
Interceptor
This is the only ship equipped with scanners that are used to scout enemy locations at the start of a new match.
The Interceptor barely makes a dent in the bigger ships, but it’s useful to take down other fighters, mines and turrets on enemy ships and stations.
Taking a missile hit in an Interceptor can cause havoc, but flares can be used to decoy a missile when it gets close. It’s a good idea to move the Flares key away from its default position on Right-ALT since that key is used for other Windows functions and you can easily get an unwanted response.
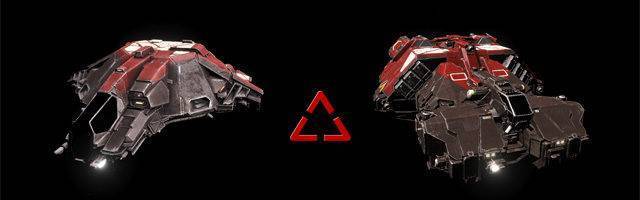
Bomber
The bomber carries a lot of quick missiles and the heavier duty torpedoes so it’s useful for attacking all ship types from a distance. In practice, I haven’t always found it easy to get a missile lock at a distance, and once you get close enough you will get a good toasting so there’s more to learn here.
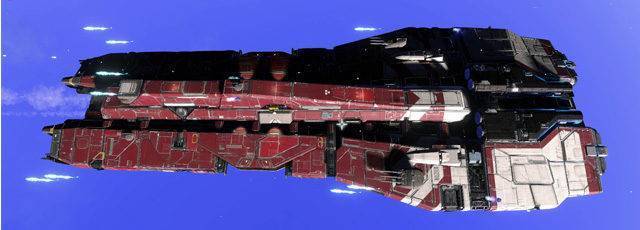
Corvette
The corvette is great for providing repair and re-arm when about 1 km from a team member. It also has an electromagnetic bomb that disrupts warp drives, preventing a getaway.
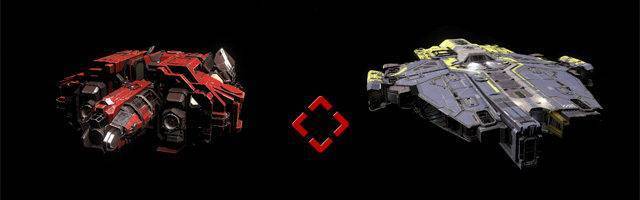
Destroyer
The Destroyer is a fun-sized version of the Cruiser and plays a support role by effectively blasting smaller ships with its armoury. It also carries mines and a warp drive neutralising bomb.
Cruiser
The Cruiser is a big heavy destroyer that can be used to obliterate stations and factories and can take a good pounding while they do it.
Carrier
The carrier provides a spawn target for team members which is a valuable strategic advantage. There is a ‘Waiting to Spawn’ counter to show the queue length for team members.
Team members cannot spawn to a carrier that is turning at a fast rate, an indicator at the top of the screen will go green when conditions are favourable.
Hauler Warp Lanes
During warp travel, you will occasionally see Hauler transport lanes marked in pale blue like ribbons. Ground-based factories spawn Haulers that transport resources to space stations along these lanes.
Haulers are identified with a diamond-shaped HUD marker. You can use a Warp jamming bomb to push the Haulers out of warp after which your weapons will be enabled and you can try to destroy it.
If a Hauler makes it to a station, its resources are converted into credits that can be spent acquiring better ships for their respective fleets. Attacking enemy factories, Haulers or stations will inhibit the growth of your enemies fleet.
Weapons
Auto Guns and Energy Blasters
The Interceptor and Bomber have auto guns and blasters that will aim towards the lead indicator of a selected target if possible.
The blasters should be used to take down shields before using guns to finish off the hull. The health of the hull and shields can be found at the top right of the Combat HUD display. You will also see that the blue flashes of shield strikes will be replaced by small explosions after the shields are depleted.
Shotgun
Shotguns are carried by Bombers.
The shotgun barrage converges on the selected target. This probably does a fair amount of damage when the shields are down but it doesn’t feel like it and the auto guns provide a more satisfactory result. That might be an illusion.
Mines
Mines are carried by Destroyers.
Mines will detonate near to enemies and bases which makes them a worthwhile target for Interceptors to clear up using kinetic weapons.
Mines launched with the safety-lock on will move towards enemies, but will eventually slow to a stop. Mines launched with the safety-lock off will fly in a straight line without slowing down. A straight line launch is useful for hitting stations and bases.
Turrets
The Corvette and the capital ships have turrets. They come in three forms:
- Manual: will aim at what the player is looking at
- Auto Aim: will track a selected target
- Auto Aim & fire: will fire on local targets
Missiles
All ships have missiles.
Missiles will acquire a targeting lock when you hold your aiming reticule on the target’s lead indicator. An icon will also appear next to the weapon graphic if visible. If you want to fire in a straight line, deselect the target mode using the Backspace key. If the ship you are tracking goes out of range you will lose the missile lock and have to re-acquire it.
Torpedoes
Bombers and Cruisers have torpedoes.
Torpedoes are a heavy-duty version of the missiles that should be used on the larger ships. In order to give them a chance to home in on their target fire at a range of about 7 km. If they miss the target they will explode on their own after a period of time.
Repair & Rearm
You can repair and rearm your ship in a station hanger or by flying near to a Corvette.
You must use an appropriately sized hangar for your ship in order to activate the repair and rearm. The pad will glow green during the maintenance period.
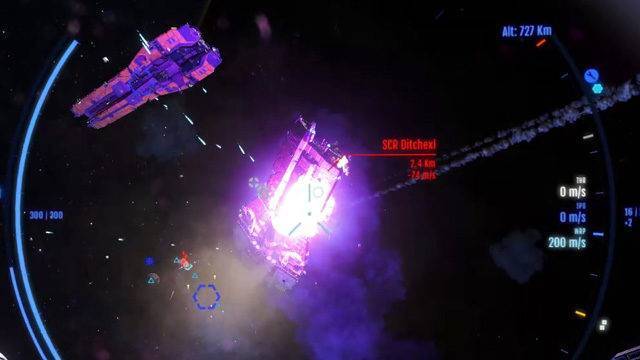
To repair at a Corvette you will need to loiter at less than 1km distance. When you are near enough, yellow streaks start circulating across your field of view. On the HUD radar, the Corvette is marked with a wrench/spanner icon to indicate that it can provide services (refer to screenshot).
Voice Activated Control
If you aren’t already familiar with the possibility of using voice commands to drive your ship, you might want to check out VoiceAttack here.
Gallery


I-Novae Video
The official Steam trailer is a good example of the kind of thing you will see in-game right now.