How to Fix a Leaking Mixer Tap
Fixing a leaking mixer tap isn’t as difficult as it first seems. All it needed was some patience and a replacement cartridge costing less than £5.
Page Contents
The Mixer Unit
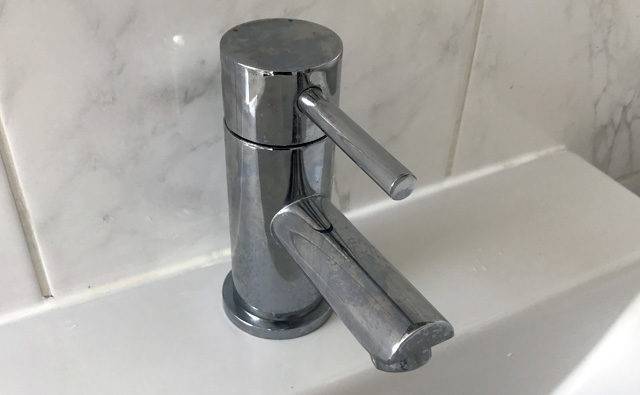
This is the pesky tap that has been leaking intermittently for no apparent reason. I had no idea how it was constructed, but Google gave me a good idea of what to expect and the rest of it was just a matter of having some patience.
Turn off the Water Supply
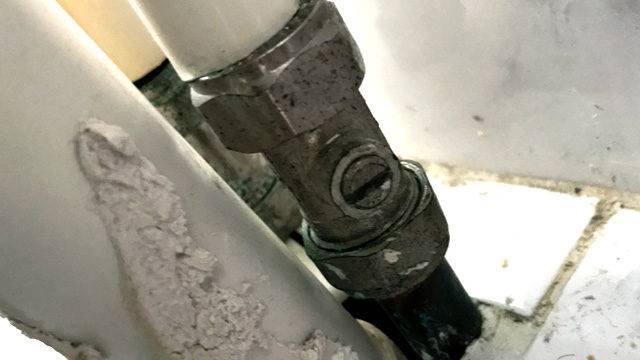
Unless you are in an old house you can normally find water disconnection joints in the hot and cold pipes leading to the tap. Turn them both off by aligning the screw slot perpendicular to the flow of water.
To ensure that the water flow is turned off completely, you can monitor it by opening your basin tap slightly to allow a small water flow. As you turn the screw in the disconnection joint the water flow in the basin tap will slow and stop. Open up the basin tap to a higher flow rate to check that a total disconnection has occurred.
Remove the Tap Cover
!! Note !!
Before you go any further, put a plug into the sink or you may lose small parts down the drain.
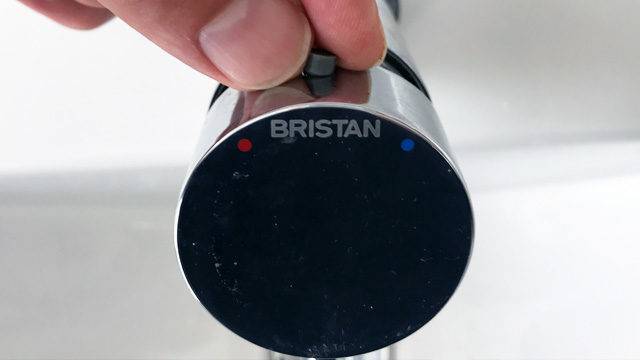
There will be hole in the head unit plugged by a soft-cover. The hole provides access to a screw that binds the head unit to the lever in the internal mixing unit. Sometimes the cover is disguised as a plastic label (eg: hot & cold symbol). Mine was plain grey and I simply pushed it into the hole and fished it out later. The head is a closed unit so it couldn’t get lost inside or cause trouble as you continue.
Remove the Tap Head
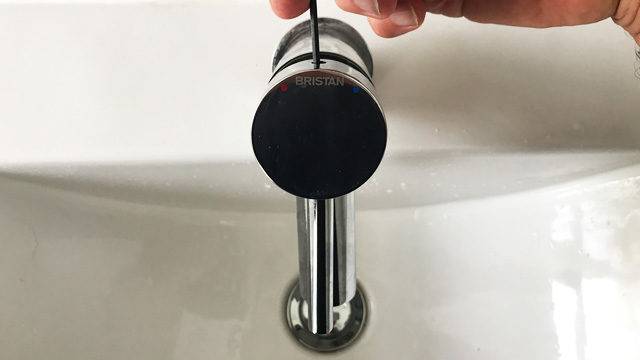
The screw was made for a 2.5mm Allen key. With the tap disconnected from the sink and leaning forward, I could insert the Allen key and disconnect the head from the internal mixing unit.
If you are careful you can disconnect the head and still leave the screw in its housing, otherwise, you run the risk of dropping the screw.
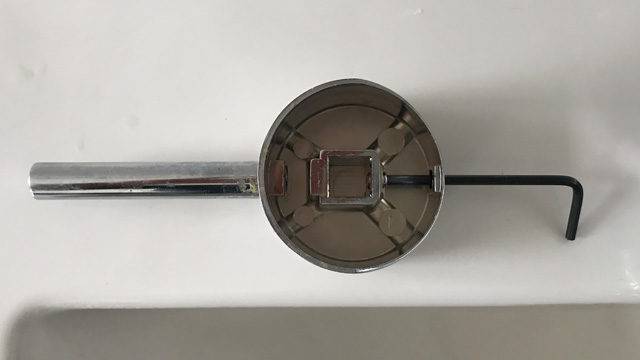
Remove the Decorative Shroud
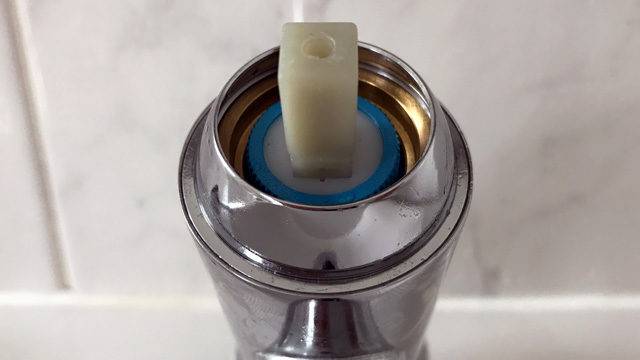
With the head removed, you can unscrew the decorative shroud anti-clockwise next. In this photo the shroud is the ring that curves inward toward the post. This is a separate ring shaped unit you may be able to undo using finger pressure.
Remove the Clamp
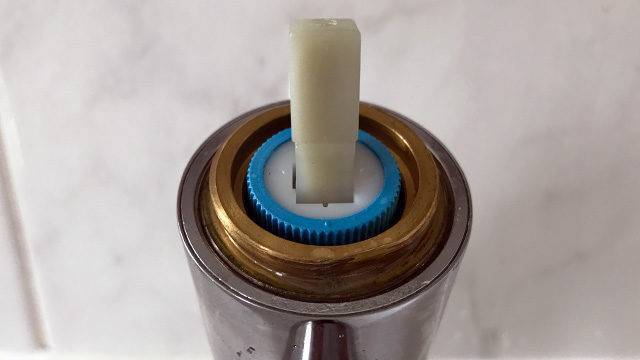
Now you can unscrew the clamp anti-clockwise. In this photo the clamp is copper coloured and its job is to apply enough force to the cartridge to seal the gromits around the hot and cold water supplies at its base. I used a wide adjustable spanner that locates onto the flattened section of the clamp.
Remove the Cartridge
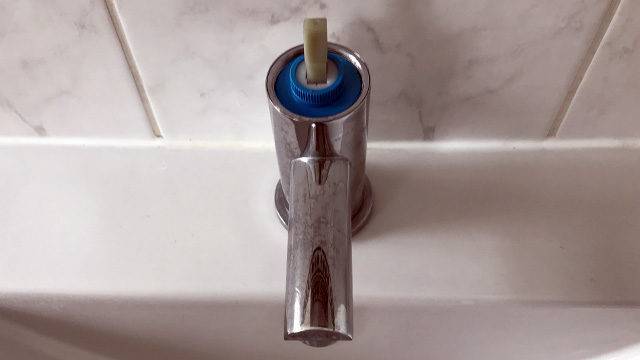
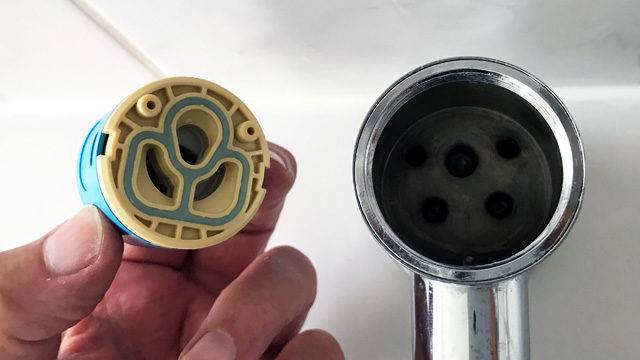
The ceramic mixing unit (with a plastic body) can now be lifted clear of the tap. You can see how the two lower holes admit hot and cold water and the mixing happens in the unit.
Replace the Cartridge
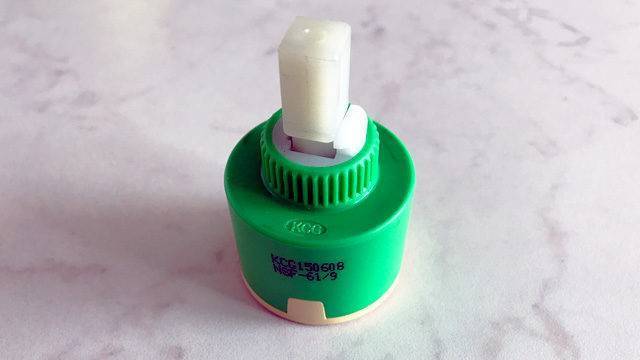
I couldn’t get an exact replacement so I opted to try one that had the same dimensions and a similar pattern around the holes in its base. I didn’t have any trouble using a replacement.
Reassemble the Tap
Clamp the new mixer unit into place and before you assemble the head, gently turn on the water supply and try moving the nylon pillar by had to ensure there are no leaks and the mixing occurs as expected.
Note:
It’s worth adjusting the disconnection valves so that the maximum flow of water is to your liking when the taps are fully open. There’s no sense in allowing maximum flow if it gushes water inconveniently fast. Secondarily, it reduces unnecessary pressure on the cartridge seals.
If the unit is working, all you need to do is replace the shroud, tap head and soft-cover and monitor its success for a few days.
In my case there was some water leakage since I was erring on the safe side when applying pressure to the gromit that secures the ceramic cartridge. Since the case is plastic, it would be relatively easy to break it with excess pressure. I tested the tension and then took it up a notch. If in doubt make small adjustments and test the water flow each time.
