T-Flight HOTAS X Maintenance
The T Flight HOTAS is a great controller for a good price but if it creaks it can be annoying and you might want to risk lubricating the ball joint.

Introduction
My Experience
I’ve had to open up and re-assemble my HOTAS a few times now. The first time was to lubricate the ball joint under the right hand stick so that it wouldn’t make distracting creaking sounds. It took several attempts to learn how to reassemble the parts correctly.
After a couple of months of lovely creak-free operation something seemed wrong and I used the Windows built-in calibration tool to verify it. Something seems to have become dislodged. I managed to fix it by opening the stick and re-seating a component at the top of the stick which is fairly easy job to to do when you know how.
Warning!
It’s likely that when I opened the stick the first time it caused the second problem to happen. On the other hand it now works better than new and doesn’t make the creaking sound that was driving me nuts!
!!! Warning !!!
This is a fiddly job!
In order to succeed you need to be patient!
Continue at your own risk!
Preparation
You will need:
- Patience and a methodical approach.
- Plenty of time.
- A small and medium cross-head screwdriver
- If you are eliminating creaking noises you will need some lithium grease or similar lubricant that won’t degrade nylon or plastic.
- Fresh Blu Tack to help the reassembly process.
- A table at convenient height with good lighting and space
- If you don’t use a container for the screws you’ll regret it.
Disassembly
Remove 4 Stick Screws
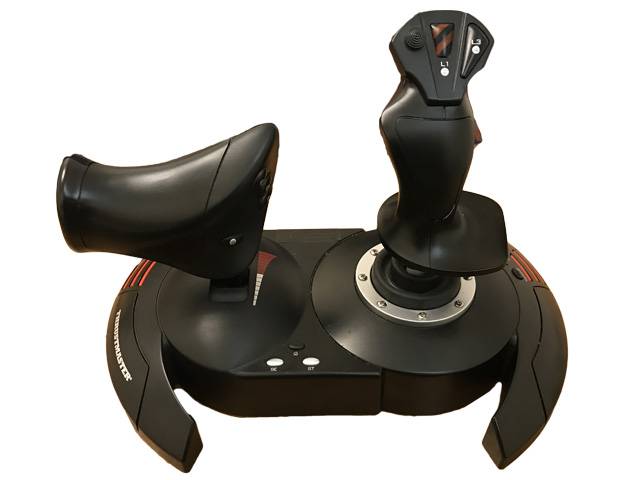
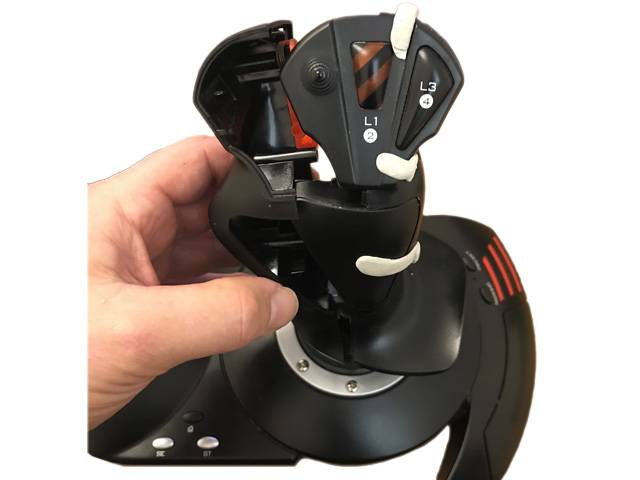
Refer to this photograph to locate all 4 screws you will remove. There are two arranged vertically on the top part of the handle and two arranged horizontally beneath the handle.
Separate the Handle
The first time you pull the handle apart it will be firmly connected as if glued. Mine wasn’t glued, but it was a very tight fit. Avoid using excessive pressure. The handle will separate into 4 pieces, most of which remain connected by wires, so be gentle.
The pieces are:
- The left and right halves.
- The topmost button assembly.
- A blanking plate in the centre.
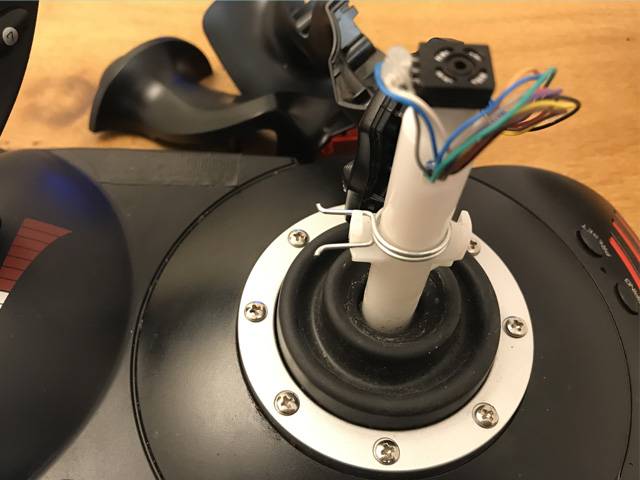
The black component at the top of the stick in figure-1 senses orientation and rotation. Notice how the spring halfway down the stick is kept open by a nylon tab.
How to Lubricate the Ball Joint
I don’t have photographs for this part, but the reference video I used is at the end of this article and will show you what needs to be done if my description isn’t clear.
- Undo the 8 screws around the ring at the base of the stick, saving all the screws to a container.
- Gently prise off the metal ring, held by friction.
- Gently release the rubber grommet underneath and pull back away from the ball joint, also held by friction.
- Push a suitable lithium lubricant deep into the ball joint, moving the joint in order to distribute it. This isn’t an easy job and the grease will go everywhere, so have something useful to help push the grease into the spaces and to clean your hands and surfaces.
- Remove excess lubricant as necessary.
- Replace the grommet, ring, and screws.
Reassembly
Prepare the Sensor & Spring
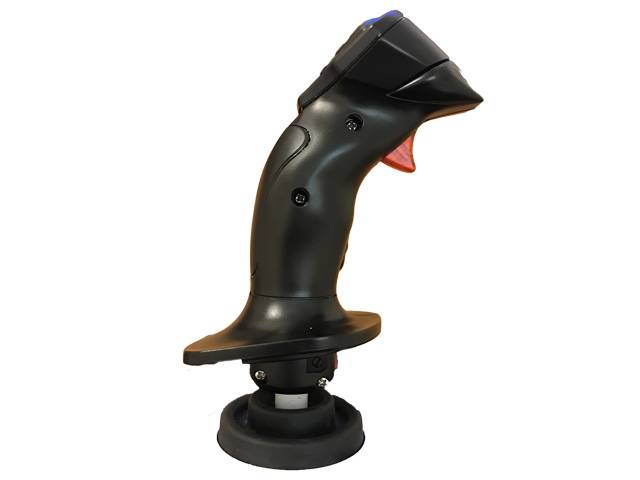
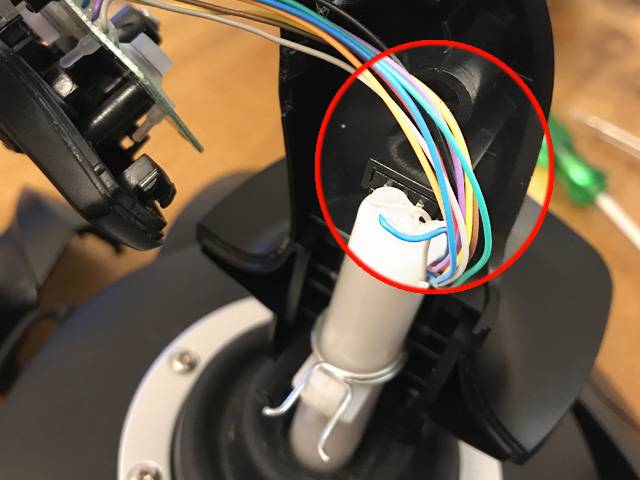
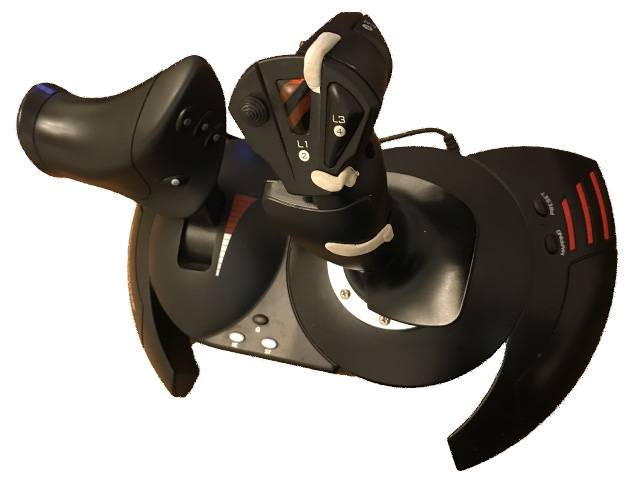
Place the HOTAS stick in front of you as shown in figure-2 with the joystick on the right. Ensure the component at the top of the stick is positioned so that the connecting wires are on the left.
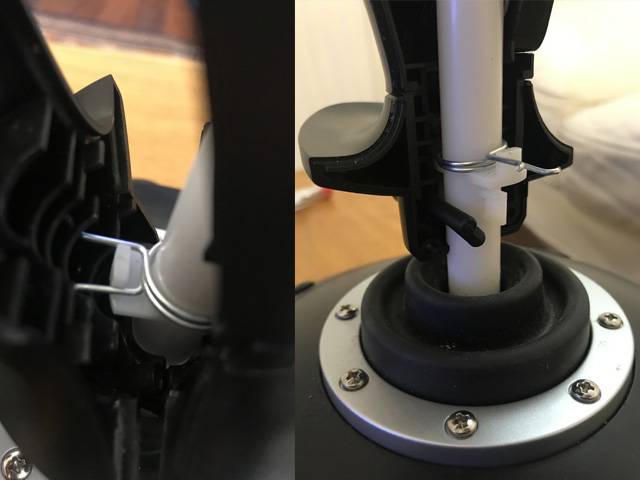
The spring half-way down the post should be held in place and configured as shown.
There are a lot of wires that will need to go into voids when you reassemble the stick. Put them into positions where they won’t be stretched or compressed as you move the stick.
Position the Right-Hand Handle Shell
Before you start
- Make sure the steel spring is configured as per the photograph (figure-2). The spring provides resistance to rotations around the centre of the stick. If not set correctly, the stick will either not rotate or else not return to its rest position properly.
- Ensure the wires of the component at the top of the stick are on the left as you look at it – pointing away from the handle shell you are about to assemble.
Gently slide the component at the top of the stick into the recess provided on the right-hand half of the handle shell, also matching the alignment lower down. Refer to the ringed section in figure-3. When it’s in position correctly, friction will keep it in place.
Connect the Central Components
To help with the reassembly, roll out some sticky Blu Tack into a cord shape and break into strips. These will be used to hold the top and middle components in place, freeing your hands to place the left-hand handle shell.
Gently slide the top button plate into position using the grooves and recesses it provides, also taking care not to snag or crimp any wires on the back of the component. When it’s in position, secure it with two strips of Blu Tack.
In a similar manner, position and secure the central blanking plate lower down the handle.
Assemble the Second Handle Shell
Support the right-hand handle and plates that are sitting on the handle and gently locate the left-hand segment at a matching height. The steel spring will be lined up to enter a recess containing a pillar against which the spring will push during rotation.
Also, note that there is a semi-circular rod beneath the spring that is in position with its ends pointing down at 45 degrees. It should remain loose. It fits into recesses on both sides of the handle.
Check that the internal wires are in safe positions.
Proceeding slowly, bring the left-hand handle into position to match the shapes on the right, keeping aware of the spring and the plastic arc beneath the spring discussed earlier.
Jiggle the left-hand handle minutely as you bring it into position to find the best connection, then apply increased pressure to bring the halves together. Test that the handle feels like it is operating normally.
Hold the two halves in position while you replace the 4 screws.
Testing
Use the Windows built in calibration tool to check and calibrate the HOTAS:
- Press the ‘search’ icon on your task bar.
- Search for Joy
- Select ‘Set up USB game controllers’
- Select the T Flight Hotas X
- Press ‘Properties’
- Select the ‘Settings’ tab
- Select ‘Calibrate’
A Maintenance Video
This video was made by ‘Goatan’
Its the one I originally used to follow the process myself. The intro section is really noisy but don’t let that put you off !