A Powerline Network Configuration Guide
Powerline manuals starting with ‘Simply’ are poor guides when network configuration fails. Here are some things manufacturers didn’t make clear.

Page Contents
General Notes
What is a Powerline Network?
A Powerline network uses electricity cables in your home to communicate. If your electrical network is earthed correctly it will work well and provide the potential for a WiFi access point anywhere in your home.
Transfer Knowledge
Different manufacturers use similar technology and ideas to make their equipment compatible with network protocols. It is possible to transfer some of the know-how to other manufacturer’s equipment and get some sense out of it.
Prepare Each Device
The most useful lesson you can learn is that you should reset a device before configuring it. A Netgear Powerline adapter has a reset button. A TV should be turned off using its remote control and then switched off at the power socket. Leave the power off for a minute to ensure all internal charge has dissipated and its internal state will be reset.
Physical Convenience
To make your job easier:
- Get the user manual for the devices you are using
- You may want to check over the video referenced at the end of this article (it’s not mine). It helped me to orient myself to the task.
- Make a spare socket available near your router to configure the 1st and 2nd power-line plugs.
- The Netgear security button cannot be reached when two plugs are side by side. If necessary choose a location with two separated sockets where you can connect the 2nd plug to the 3rd.
Configuring the Powerline Network
This guide is an explanation of the process I went through to create a home powerline network to support an extended WiFi network. The router was already set up and configured with a secured WiFi.

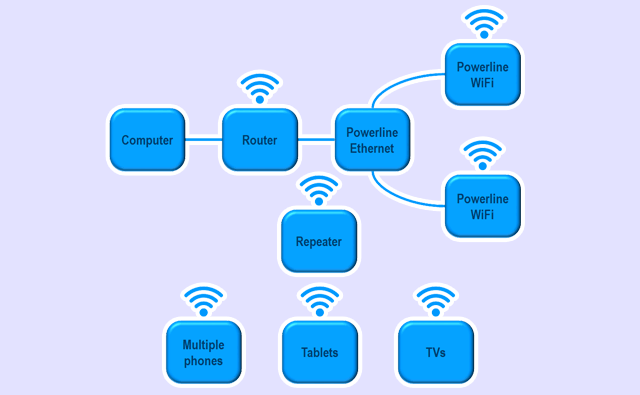
The full target network used here is composed of:
- A BT Hub router (supplied by UKs British Telecom broadband provider)
- Three Netgear AV500 powerline plugs, two of which provide WiFi.
- A TP-Link WiFi Extender
- Two Samsung smart TVs, phones and tablets
The three stages of creating the extended network are:
- Create an unsecured powerline network
- Create a secured powerline network
- Create a unified secured WiFi network
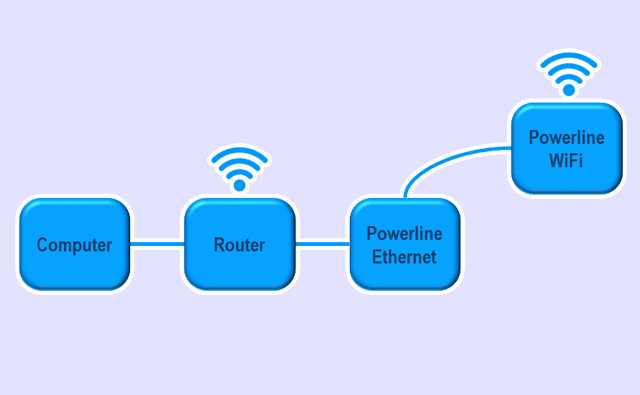
How to Create an Unsecured Two Plug Network
For this step, you will ignore the WiFi network and concentrate only on the power-line devices. Refer to your user manual on whatever power-line plugs you have as necessary.

Connect the initial power-line adapter:
- Unplug all powerline network plugs to avoid confusion
- Plug in the non-WiFi powerline plug next to your router.
- Connect the plug to your router via an ethernet cable.
- Turn the powerline plug on
- Reset it the plug as described in its manual. For Netgear products, locate a hole inside which a reset button has been hidden. A nail makes a good pin to do this job.
- The power light will begin to flash
- Wait for the LEDs to settle
Connect the second powerline adapter:
- Plug in a single wifi plug
- Turn it on
- Reset it
- Allow both plugs time to establish an unsecured network.
- Wait until all LEDs settle
- Check the state of the LEDs using your manufacturers guide
- Test the network names using a phone. A default WiFi name for the manufacturer’s power-line WiFi plug should appear as well as your router’s existing WiFi name. Ignore the WiFi for the time being.
How to Secure the Two Plug Network
Be clear that we are only securing the power-line network composed of 2 plugs, not it’s WiFi signal. This is the sequence for a Netgear AV500 plug:
Note: Be aware that in this case the security button for the plug that is already in the network was pressed first. The new plug’s security button was pressed last.
- On the router’s non-WiFi power-line plug, press the security button for between 1 & 2 seconds then release it.
- Not too short a time or too long a time or nothing will happen
- If you held for the correct period the power light will begin flashing.
- Press the security button on the second power-line device.
- Once both plug lights settle, assume the powerline network is secure. There isn’t any way to check it easily.
How to Configure the WiFi
Now that there is a WiFi plug in the network, we can configure its network name and password automatically by using the router’s WPA button.
Note: There is a subtle difference here! Be aware that in this case the security button for the plug that is already in the network was pressed last. The new plug’s security button was pressed first. This is the opposite way around to the earlier instruction. Perhaps it makes no difference – I haven’t tested that point.
Tip: I used an iPad to connect directly to the router in order to trigger the WPA broadcast. This will be useful when you are setting up smart TVs etc. in different rooms. It’s also a good way to confirm that the WPA broadcast mode is still active.
- Press the router’s WPA button for 2 seconds and release. It should now display a flashing LED.
- On the Wifi plug, press the security button for 10 secs and release.
Note: The 10-second figure worked but I don’t know if this is different instruction to a 2-second press or is the same thing. - The WiFi plug will adopt the router’s WiFi network name and password.
- Test the WiFi name by using a mobile phone to show the available network names. The default manufacturer’s network name should have disappeared (it’s now the same as the router’s WiFi name).
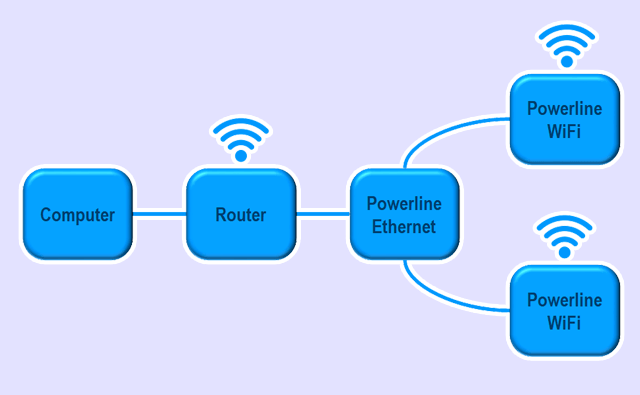
How to Add an Extra Powerline Adapter
Due to the physical layout of the Netgear AV500 powerline adapters, it isn’t possible to operate two plugs using a single two plug electrical socket, because the buttons aren’t accessible. It was necessary to now move the current and new WiFi adapters to a different room with two sockets located near to each other for convenience.

- Plug in the configured wifi device and allow it to settle.
- Check that the network name is correct by ensuring it’s not the default manufacturer’s WiFi name.
- Plug in the unconfigured WiFi plug and reset it
- Wait for both plug LEDs to stabilise
- Press the security button on the NEW unconfigured wifi plug for 2 seconds and release it
- On the already configured WiFi plug, press the security button for 2 seconds
- Wait for the LEDs on both plugs to stabilise
- Check the LED states to ensure that you have a valid network. If not, reset the new plug an try again.
Once you have integrated the new powerline plug into the network
- The power-line network is secured.
- You will now need to update the Wifi name and password for the new WiFi plug
- Move the new plug back near the router, power it up and go through the setup for WiFi as before, using the router’s WPA button.
- Using a mobile phone, check that the default network name for the power-line plugs is not present.
Now that you have a secured powerline network with a secured WiFi signal you are ready to distribute the plugs.
Tip: Using a mobile phone, examine the available network names. If you suspect that a powerline plug is broadcasting a default name you can test it. Switch off the suspect plug and refreshing the network list on your phone to see if it disappears.
How to Configure the Repeater
For good measure, plug in and power up the repeater. Ensure it is connected to the existing network using the WPA button on the router and device.
You can check that the repeater is doing its job by referencing the strength of the signal you receive on your phone’s WiFi connection.
How to Configure Your TVs
As already advised, the crucial part here is to turn your TV off at the socket for 1 minute. The TV will no longer be able to maintain any internal configuration state other than those properly intended by the manufacturer.
- Power the TV off at the socket for 1 minute
- Power the TV back on.
- Go to network settings.
- If you have the option, use WPA to allow the TV to configure itself to your WiFi.
